Using Jadex on Android
Once you have installed the necessary tools, the jadex-android-example-project can be helpful to get started.
This guide, however, does not assume you are using the example project, but instead introduces the API of Jadex for Android step by step.
To understand the basics of android application development, please take a look at the Android Developer Guide . This guide and all included demo applications are currently using a minimum API Level of 16, which is supported in android 4.1 and above.
We assume that you created a basic Android Application to start with.
Differences to the desktop version of Jadex
While developing Active Components is the same on the standard Jadex distribution and the android version, everything else is different. We try to list some of the differences here to avoid confusion.
-
No JCC: First, there is no JCC (Jadex Control Center). This has a simple reason: There are no Java swing components included in the Android runtime libraries. But, when you develop Android Applications, you'll want to have a native UI anyway.
-
UI as entry point: In the Desktop variant of Jadex, you have Active Components that create their own UI. On Android, the entry point of an application IS the UI (e.g. an Activity). Because of this, components can never create the UI on Android.
-
The Jadex Platform runs inside an Application: In consequence, instead of running the Jadex Platform and then starting applications, on Android, you will first start your application which then can launch a Jadex Platform. The Platform is also not shared across applications. This is very similar to the Jadex application integration, so most things written down there also apply for Jadex Android.
-
UI can be paused any time: Because an Android UI Component can be paused or destroyed at any time, it is recommended to let the Jadex Platform run in an Android Service.
-
BDIV3 compile time generation: If you want to use BDIV3 components on Android, you need to include a gradle plugin that handles the code generation that is required. As opposed to desktop variants, in Jadex Android, the required code is generated at compile time to save performance. This is described in detail in Chapter 04.
Required Libraries
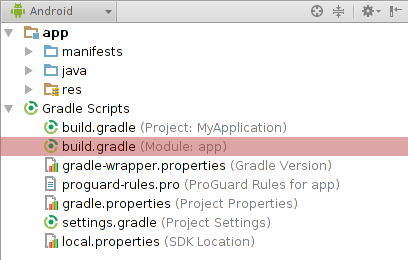
To use Jadex for Android, first open your project's build.gradle. It's usually located in app/build.gradle and shown in the Gradle Scripts section of android studio:
Now add the following lines (or insert them into the right configuration blocks) to include the Jadex dependencies:
repositories {
    mavenCentral()
    maven
    {
        name 'jadexsnapshots'
        url 'https://nexus.actoron.com/content/repositories/oss-nightlies/'
    }
    maven
    {
        name 'jadexreleases'
        url 'https://nexus.actoron.com/content/repositories/oss/'
    }
}

dependencies {
    // required:
    compile 'org.activecomponents.jadex:jadex-platform-android:3.0.0-RC80'

    // optional:
    compile 'org.activecomponents.jadex:jadex-kernel-bdiv3-android:3.0.0-RC80'

    compile 'org.activecomponents.jadex:jadex-kernel-bpmn:3.0.0-RC80'
    compile 'org.activecomponents.jadex:jadex-kernel-component:3.0.0-RC80'
    compile 'org.activecomponents.jadex:jadex-android-xmlpull:3.0.0-RC80'
    compile 'org.activecomponents.jadex:jadex-android-antlr:3.0.0-RC80'

    // Control center:
    compile 'org.activecomponents.jadex:jadex-runtimetools-android:3.0.0-RC80'
    // REST client:
    compile 'org.activecomponents.jadex:jadex-platform-extension-webservice-android:3.0.0-RC80'
}
You can of course leave out any optional dependency as long as you don't need it.
Application Manifest
Then, in your AndroidManifest.xml, declare the following permissions, if you want the Jadex Platform to communicate with others:
    <uses-permission android:name="android.permission.INTERNET"/>
    <uses-permission android:name="android.permission.ACCESS_WIFI_STATE"/>
Start a Jadex Platform
To use Jadex components, you first have to start a Jadex Platform. This can be done in two different ways, both of them are described below.
Use the Jadex Platform directly in an activity
This method is only recommended for simple applications, e.g. if you don't care about the application's lifecycle, getting paused by the system or running in background. Also, the Jadex platform will shutdown if the application gets destroyed, for example when turning the device. Skip this section if you don't like that.
If such limitations doesn't matter or you simply want to test Jadex on Android, you can have your main activity extend the JadexAndroidActivity class. This replaces the Android Activity class and provides additional, jadex-related functionality.
The Jadex-Android-Example-Project shows how to use this method in the jadex.android.exampleproject.simple package.
The following code shows how to set-up a jadex platform.
public class HelloWorldActivity extends JadexAndroidActivity
{
public HelloWorldActivity()
  {
    super();
    setPlatformAutostart(true);
    PlatformConfiguration config = getPlatformConfiguration();
    config.setPlatformName("HelloPlatform");
    RootComponentConfiguration rootConfig = config.getRootConfig();
    rootConfig.setAwareness(true);
    rootConfig.setKernels(KERNEL_MICRO);
  }
}
Available platform options are documented here . Setting up an activity like this will start a jadex-platform during the onCreate() phase and inform the activity about the progress in the two methods
onPlatformStarting()
and
onPlatformStarted()
like this:
  @Override
  protected void onPlatformStarting()
  {
    super.onPlatformStarting();
    // own logic here
  }

  @Override
  protected void onPlatformStarted(IExternalAccess result)
  {
    super.onPlatformStarted(result);
    IComponentIdentifier platformId = result.getComponentIdentifier();
    // own logic here
  }
The jadex platform will also be automatically terminated during the onDestroy() phase, e.g. when the activity is terminated by the user.
If you use setPlatformAutostart(false), the platform can be started manually by calling startPlatform().
Regardless of which method us beeing used, the platform can always be stopped by calling
stopPlatforms().
Use the Jadex Platform in a service
If you need to create a more complex application, which should perform background tasks or should at least keep a jadex platform running in background, you should use the jadex platform in an android service .
The Jadex-Android-Example-Project shows how to use this method in the jadex.android.exampleproject.extended package.
Creating your Jadex Service
For your service class, extend JadexPlatformService like this:
public class MyJadexService extends JadexPlatformService
By default, the service will autostart a jadex platform on creation. To adjust Jadex Platform behaviour, implement the constructor like below:
  public MyJadexService()
  {
    super()
    setPlatformAutostart(false);
    PlatformConfiguration config = getPlatformConfiguration();
    config.setPlatformName("HelloPlatform");
    RootComponentConfiguration rootConfig = config.getRootConfig();
    rootConfig.setAwareness(true);
    rootConfig.setKernels(KERNEL_MICRO);
  }
As with using jadex from an activity, you can override the methods onPlatformStarting() and onPlatformStarted() to get access to the platform inside the service.
Take a look at the Api Docs to see available methods for starting and configuring the platform.
Additionally, it is useful to override onBind() to return your own Binder object and specifiy your own service interface. See the Android docs: Bound Services for more information about this topic.
Declaring your service
To allow Android to start your service, it has to be declared inside the AndroidManifest.xml inside the application tag:
<service android:name=".MyJadexService"/>
Binding your Service
As with any Android Service, you can bind your Jadex Service in your main activity like this:
    Intent i = new Intent(MainActivity.this, MyJadexService.class);
    bindService(i, new ServiceConnection() {
        public void onServiceConnected(ComponentName name, IBinder service) {
            // your code here
            JadexPlatformBinder binder = (JadexPlatformBinder) service;
            IFuture<IExternalAccess> fut = binder.startJadexPlatform();
        }

        public void onServiceDisconnected(ComponentName name) {
            // your code here
        }
    }, BIND_AUTO_CREATE);
Create Agents/Components
Agents and components are implemented just like in the Jadex desktop variant.
A Component is started by the method startComponent(), which is available both in the activity and the service base class.
As Parameters, you have to specify a component name and the path to it's model (class or xml) file, like jadex/android/applications/demos/bdi/HelloWorld.agent.xml. In case of MicroAgents, you can specify the Class of the Agent directly, e.g.
startComponent("HelloWorldAgent", MyAgent.class).addResultListener(new DefaultResultListener<IComponentIdentifier>() {
  public void resultAvailable(IComponentIdentifier result)
  {
    System.out.println("Agent started");
  }
});
With the Result Listener you will be informed when the Agent is created. For more advanced scenarios, you can pass a CreationInfo object to the Agent which can contain additional parameters.
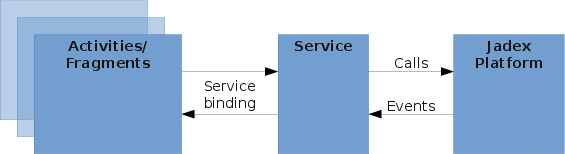
Agent <-> Android Service Coupling
The communication between Component and Service can be handled using a ProvidedService and JadexAndroidEvents. The Combination of the two offer an easy way of agent-service coupling.
The idea is that the Android Service can invoke methods on the Agent through an interface, while the Agent can inform the Android Service about what's happening through events. Both ways are described below.
Communication with the activity will not be mentioned in this tutorial, as it is recommended to handle all agent-based communication in a service, since activities are pause/resumed/destroyed on a regular basis and thus are not reliable. The image below shows an overview of the communication model:
Android Service to Agent
To make a Component accessable by the Android Service, first create the required interface:
public interface IAgentInterface
{
  void callAgent(String message);
}
Now let your Component implement that interface and add it to the ProvidedServices declaration:
@ProvidedServices({
  @ProvidedService(name="agentinterface", type=IAgentInterface.class)
})
@Service
@Agent
public class MyAgent implements IAgentInterface
{
  public void callAgent(String message) { ... }
}
To gain access to the Component via the interface you created, use the following code in your Android Service:
  IAgentInterface agent = getService(IAgentInterface.class).get();
  agent.callAgent("Hello Agent!");
If you are using Jadex inside a JadexAndroidActivity, call getPlatformService() first:
  IAgentInterface agent = getPlatformService().getService(IAgentInterface.class).get();
  agent.callAgent("Hello Agent!");
Agent to Android Service
Agent to Android Service communication is done event-based.
Creating and registering events
First, create a custom Event Type that extends JadexAndroidEvent :
public class MyEvent extends JadexAndroidEvent
{
  private String message;

  public String getMessage()
  {
    return message;
  }

  public void setMessage(String msg)
  {
    this.message = msg;
  }
}
For your Service to listen to Agent events, it has to register an EventReceiver in your service (you can do this in onCreate() ).
If you are extending the JadexAndroidActivity, you can use getPlatformService().registerEventReceiver() instead.
final Handler handler = new Handler();
registerEventReceiver(new EventReceiver<MyEvent>(MyEvent.class)
{
  public void receiveEvent(final MyEvent event)
  {
    handler.post(new Runnable()
    {
      public void run()
      {
        System.out.println("received message: " + event.getMessage());
      }
    });
  }
});
Notice the Handler, which is used here to run code on the UI Thread, so you can easily post a Toast instead of just printing to the console.
Dispatching events
To dispatch events in an Agent, the IContextService is needed, which provides functionality to interact with the Android App Context. This service is automatically started on Android devices. To use it, add a service declaration to your agent type:
@RequiredServices({
    @RequiredService(name="context", type=IContextService.class, binding=@Binding(scope=RequiredServiceInfo.SCOPE_PLATFORM))
})
public class...
Now, the service can be injected into a field:
    @AgentService
    protected IContextService   context;
And used inside the agent's body method (or elesewhere after the instantiation of the agent):
    @AgentBody
    public IFuture<Void> executeBody()
    {
        MyEvent myEvent = new MyEvent();
        myEvent.setMessage("Hello Service!");
        context.dispatchEvent(myEvent);
        return new Future<Void>();
    }
The dispatched event will then be passed to the matching event receiver.
Accessing the platform
The provided methods for accessing the platform depend on whether you are using JadexAndroidActivity (running Jadex inside an activity) or JadexPlatformService (running Jadex inside a service). You can, however, get the internal platform service from a JadexAndroidActivity by calling getPlatformService(). The returned object should contain all methods listed here. See also API docs.
- isPlatformRunning(): Checks whether the platform is running or not.
- getService(): Gets a service of a component running on the platform (asynchronously).
- getsService(): As before, but blocks until the service is found (synchronously).
- startComponent(): Starts a component on the platform.
- shutdownJadexPlatform(): Terminates the platform.
If you want to access the platform manually, for features not covered by provided methods, you can use the following methods:
- getPlatformAccess(): returns the external access to the platform
Using remote services
Jadex was designed for distributed systems and Jadex-Android supports all the distribution features, too. To use a remote service, just declare the required service like usual in the agent:
@RequiredServices(
  {@RequiredService(name = "myservice", type = IMyService.class, binding = @Binding(scope = Binding.SCOPE_GLOBAL))})
Be sure to use the same Interface on both the service consuming and the service providing application, e.g. use the same package and class name for the service interface. If Binding scope is set to global, services running on a desktop platform will be discovered by android devices, too.
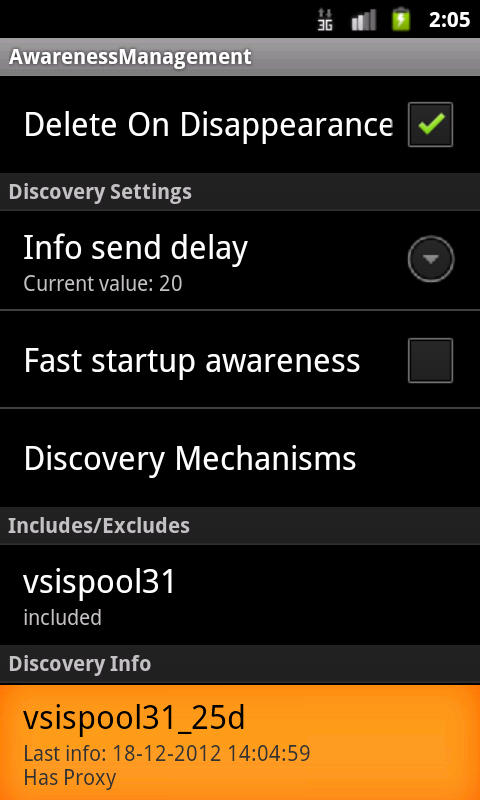
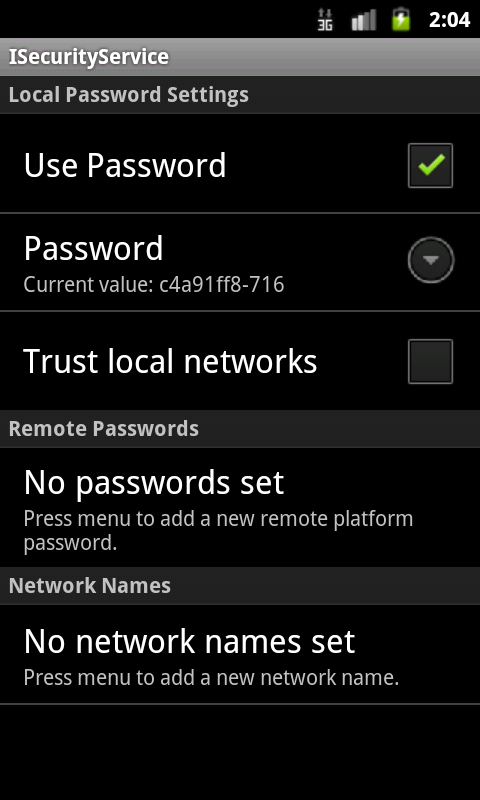
Using the Jadex Android Control Center
Jadex Android provides a simple replacement for the desktop-only JCC to configure security and awareness settings:
To use it, be sure to include the jadex-runtimetools-android dependency in your build.gradle (see Required Libraries). Add the JadexAndroidControlCenter Activity to your AndroidManifest.xml:
<activity android:name="jadex.android.controlcenter.JadexAndroidControlCenter"/>
The Control Center can then be launched from any jadex-android application as follows:
Intent i = new Intent(this, JadexAndroidControlCenter.class);
i.putExtra("platformId", (BasicComponentIdentifier) platformId);
startActivity(i);
This is also part of the example-project.